How I Edit Photos
My personal style of editing is to keep the photo natural, but editing such that I change 'the mood' of the photo.
The tools I use include Adobe Photoshop and Adobe Lightroom Classic.
I always make sure to shoot my photos in RAW format so that they retain the most data for me to edit later on.
Below are some photos that have been edited, along with some explainations for each photo - drag the circle to compare the before and after.
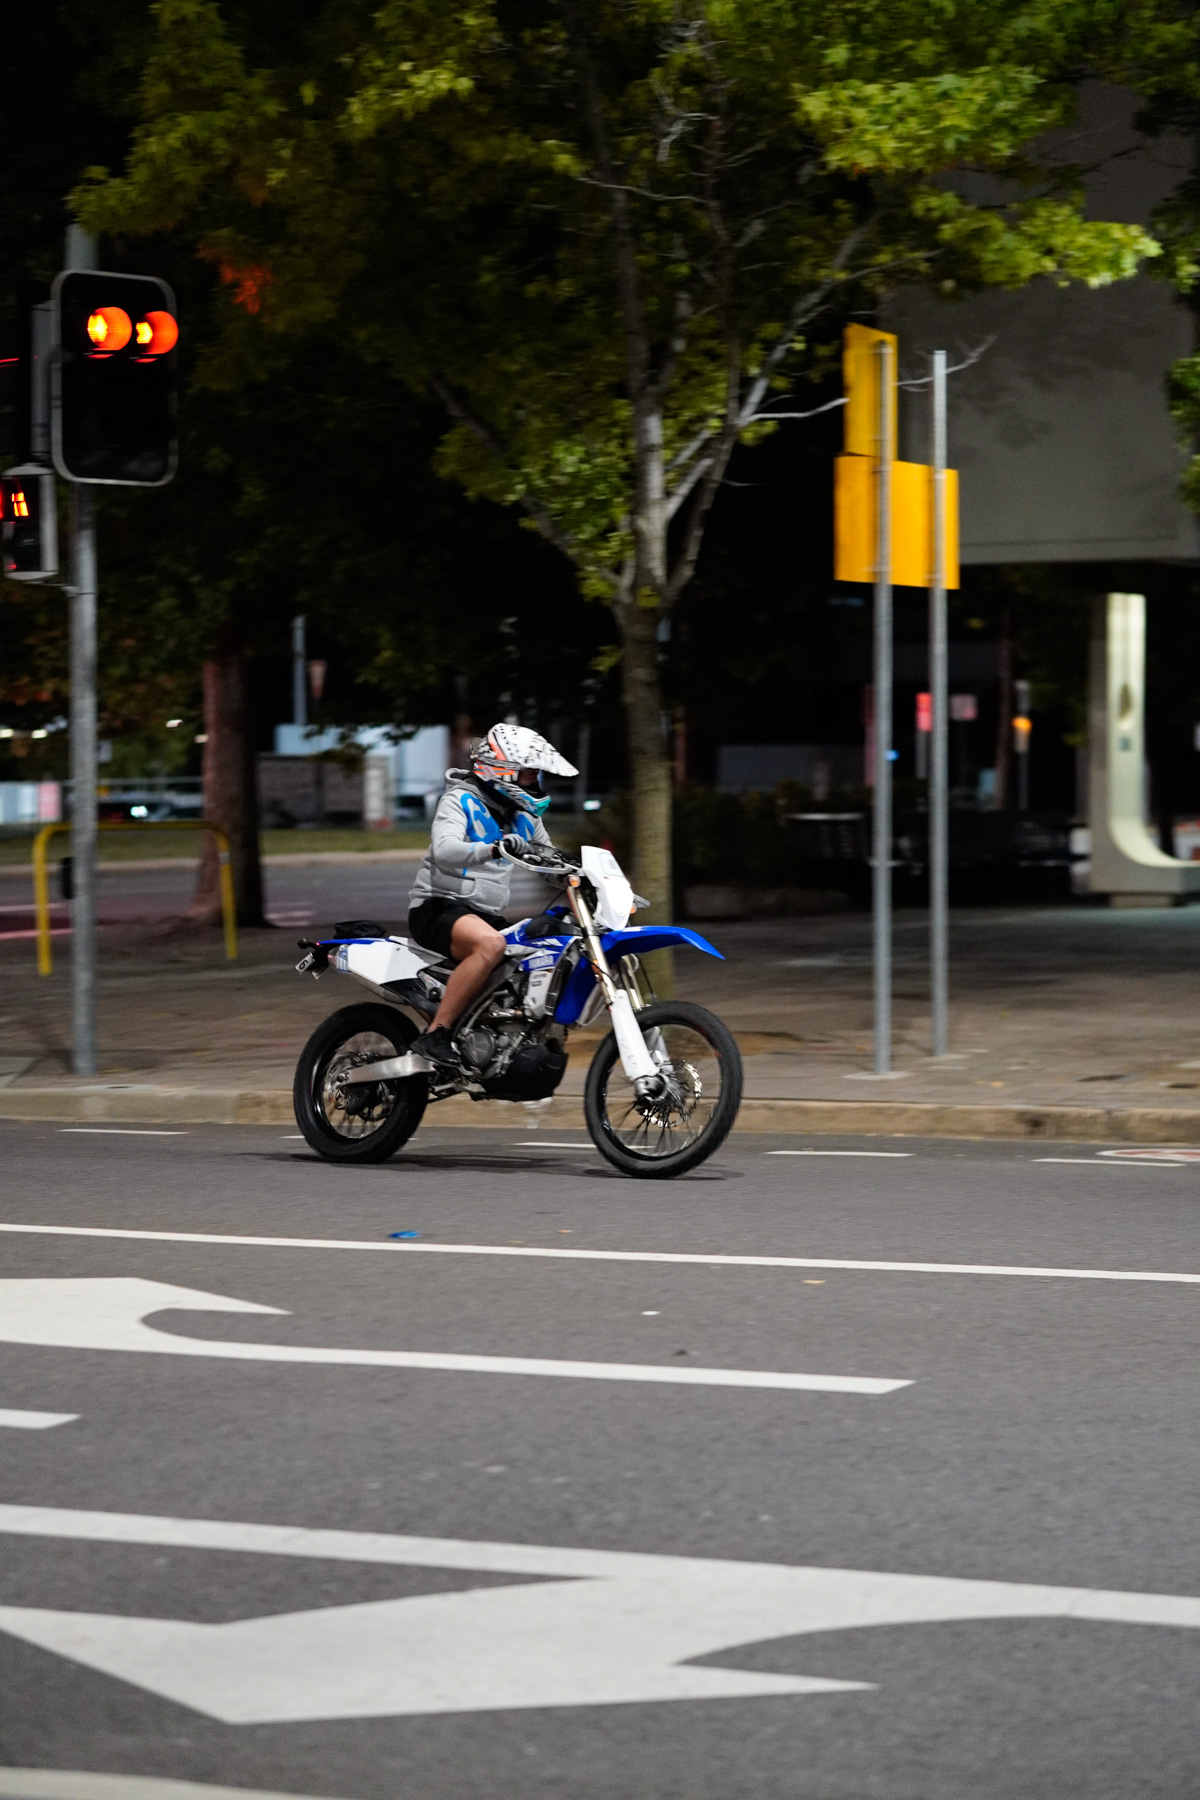
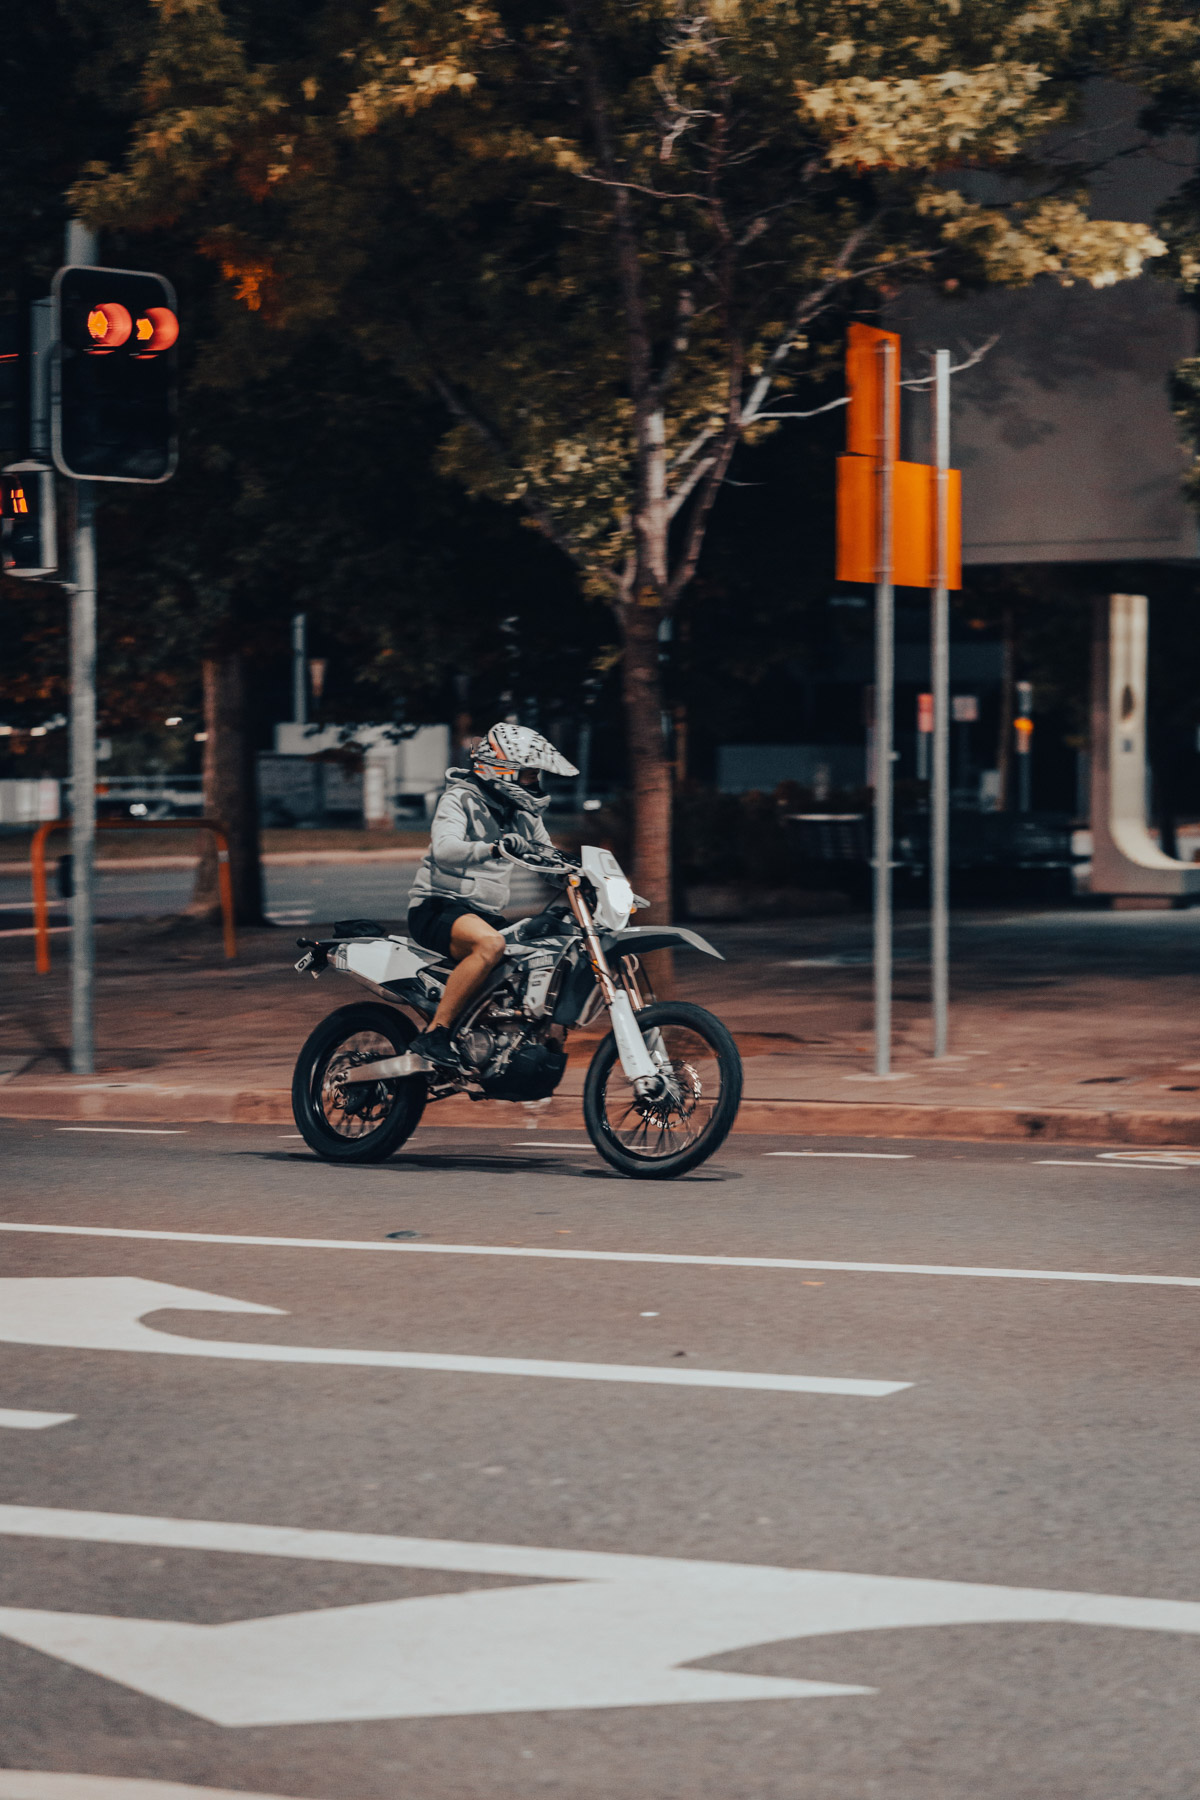
Above is an image of a motorbike in Civic.
I edited this photo in a way that only included monotone and the colour orange.
I did this as I wanted to put emphasis on certain elements of the photo, such as the details of the bike.
Alternatively I could have put empahasis on the colour blue to accentuate the rider's clothes and bike, however I believe that the warm tone
changes the feeling in a nice way.
Above is a comparison between an image that has been denoised and an image without denoising.
The technology available to us nowadays is astonishing.
This is an a snippet of an image I ran through Adobe Lightroom's AI Denoiser.
In my opinion, it completely saved an otherwise very noisy/grainy photo that wouldn't be suitable for printing or for high resolution scenarios.
Shooting in RAW allows us to completely save images that have been shot incorrectly as well.
In the original image, the camera has attempted to expose for the sky - which has crushed the shadows and left a lot of dynamic range on the table.
I can make use of the fact that shadows still have a lot of data in them, and thus lift them in Adobe Lightroom.
Shadows that have been lifted are often noisy/grainy - so we can put this through the denoiser to get a great result.


